1. Introduction:
Sometimes, machines or tools stop working properly. If you have an OHILFOZ4.5L and it stops working, you need a fix. The best way to fix it is by installing a new part: OKCFOZ4.5L. By following a few simple steps, you can do this yourself. This guide will explain each step clearly. The steps are easy to follow, and by the end, your OHILFOZ4.5L should work like new.
Before we get started, let’s understand the importance of these parts. OHILFOZ4.5L is a key component, but it can wear out over time. When it does, the device may stop working correctly. Installing OKCFOZ4.5L is the best solution to fix this problem. OKCFOZ4.5L is made specifically to replace OHILFOZ4.5L. It is a direct fix. So, you can get your device back to its best performance.
How to Install OKCFOZ4.5L to Fix OHILFOZ4.5L
When things break, we all want to fix them quickly. If you have an OHILFOZ4.5L that’s not working well, it may be time to install OKCFOZ4.5L. These parts are made to help fix problems. This guide will demonstrate how to accomplish that. It will be easy, step-by-step, and you will learn everything you need to know.
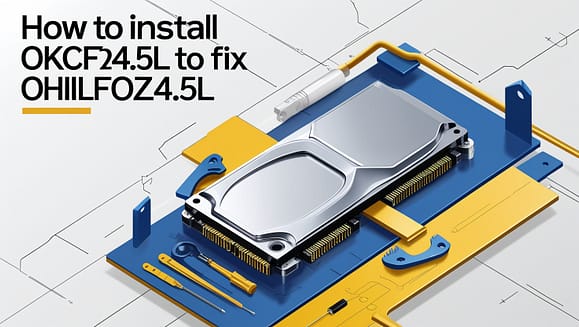
2. Tools You Need
Before you start, it’s important to have the right tools. This will make the job easy and fast. Here’s what you need:
- Screwdriver: You will need a screwdriver to remove and install parts.
- Wrench: A wrench helps tighten screws or bolts.
- Safety gloves: These gloves protect your hands from sharp parts.
- Work gloves: These are thicker gloves that protect your hands when working with heavy parts.
- A clean cloth: Use this to wipe dust or dirt off parts.
- OKCFOZ4.5L part: This is the new part you will install.
Having the right tools is important. It makes sure the work is done safely and properly. If you do not have these tools, it is a good idea to get them before you start.
3. Safety First
Safety is the most important thing when fixing anything. Here are some safety tips:
- Wear gloves: Always wear gloves to protect your hands.
- Work in a clean space: Keep your workspace free of dust and dirt.
- Turn off the device: Always turn off the power before starting any work.
- Be careful with parts: Some parts can be sharp or heavy. Handle them carefully.
- Check for electric shocks: If you are working with electrical parts, make sure everything is off and unplugged.
By following these safety tips, you can work safely and avoid accidents. Always be careful when working with machines or tools.
4. Preparing for Installation

Before you start the installation, make sure everything is ready. Here’s what you need to do:
- Find a good workspace: You need a clean, flat surface to work on. It should be big enough for all the parts.
- Check the device: Make sure you understand how to remove the old part and install the new one. You can look at the user manual for more help.
- Read the instructions: Each part, like OHILFOZ4.5L and OKCFOZ4.5L, usually comes with its own instructions. Read them carefully before you start.
- Check the parts: Make sure OKCFOZ4.5L is the right part for your OHILFOZ4.5L. This will help avoid mistakes.
Once you have everything set up, you’re ready to begin the installation.
5. Step-by-Step Guide to Install OKCFOZ4.5L
Now that you are ready, let’s go step-by-step through the installation. These steps are simple and easy to follow.
Step 1: Turn Off the Device
Turning off the gadget is the first step. Verify that the gadget is fully turned off. This is important because you don’t want to work on the device while it is still on. Turning off the device keeps you safe. You can turn it off by using the switch or unplugging it from the wall.
Step 2: Disconnect Power Supply
After turning off the device, you need to disconnect the power supply. This is another important step to avoid any accidents. Look for the power cable or any wires connected to the device. Carefully unplug them. This stops any power from running through the device while you work. It is always best to be extra careful when handling electrical parts.
Step 3: Remove the Old OHILFOZ4.5L Part
Now, you need to remove the old part, OHILFOZ4.5L. This part may be screwed into place or connected in some other way. Use your screwdriver or wrench to remove any screws that hold the part in place. Be gentle as you remove the part. If it’s stuck, don’t force it. Try to wiggle it free slowly. Once you’ve removed OHILFOZ4.5L, set it aside in a safe place.
Step 4: Install the OKCFOZ4.5L Part
Once the old part is removed, it’s time to install OKCFOZ4.5L. Take the new part carefully and place it in the spot where the old part was. It should fit perfectly. Use your screwdriver or wrench to screw the new part into place. Be sure to tighten it, but not too much.. If you make it too tight, it could damage the part. Make sure it is securely in place, but not over-tightened.
Step 5: Reconnect the Power Supply
Now, you can reconnect the power supply. Take the power cord and plug it back into the device. Make sure the connection is secure. If there are any other connections that were unplugged, connect them now. After you have reconnected everything, the device is ready for testing.
6. Testing the Installation

After you have installed the new part, it is time to test it. Turn the device back on. See if it is working as expected. If it is working well, you have done the job correctly. If there are any problems, check again. Maybe something was not installed correctly.
Here are a few tips to check the installation:
- Check the connections: Make sure all wires are connected well.
- Look for loose screws: Sometimes, screws can come loose. Check if everything is tight.
- Test the device: Turn the device on and use it to see if it works as before.
If it works well, then the installation is successful. If there are problems, you may need to go back and check each step again.
7. Troubleshooting
If something goes wrong, don’t worry. Here are some frequent issues and how to resolve them..
Problem 1: The Device Does Not Turn On
If the device doesn’t turn on after you’ve installed OKCFOZ4.5L, it could be due to one of these issues:
- Loose connections: Check the power supply again. Make sure everything is plugged in tightly.
- No power: Check if the device is properly plugged into a working outlet.
- Improper installation: Go back and check if the part was installed correctly.
Problem 2: The OKCFOZ4.5L Does Not Fit
If OKCFOZ4.5L does not fit into place, there may be two reasons:
- Wrong part: Double-check that OKCFOZ4.5L is the right part for your OHILFOZ4.5L.
- Improper alignment: Make sure the part is aligned correctly before trying to install it.
Problem 3: The Device Works, but It Makes a Strange Noise
Sometimes, the device may work but make strange noises. If this happens, try these fixes:
- Loose parts: Check if any screws or parts are loose. Tighten them gently.
- Improper installation: Check if the part is installed in the right position.
Conclusion
Installing OKCFOZ4.5L to replace OHILFOZ4.5L is a simple yet effective solution to restore your device’s performance. By following the easy step-by-step guide, using the right tools, and ensuring safety, you can complete the installation yourself, saving time and money. Make sure to test the device after installation and troubleshoot any issues for a smooth operation. Remember, proper installation of OKCFOZ4.5L is crucial for the device’s optimal functionality.
If you follow the instructions carefully and address any problems that arise, your device will work like new. With OKCFOZ4.5L as a reliable replacement, you can enjoy improved performance and a longer lifespan for your device. Whether you’re fixing it for the first time or upgrading, this solution ensures your OHILFOZ4.5L is replaced effectively and efficiently.
Latest post
Ast Hudbillja Odds: The Future Benefits
Problems with OKCFOZ4.5L Install OHILFOZ4.5L: A Complete Guide
Myosarcas: Key Insights into This Rare Muscle Disorder
2 thoughts on “How to Install OKCFOZ4.5L to Fix OHILFOZ4.5L”